Sunday, May 29, 2011

Work Bench

While my husband was out of town for training, my parents came to visit.  I wanted to make some sort of workbench that I could use for my projects for him to keep his tools.  Over the few weeks before they got here, my Dad and I sent tons of pictures of workbenches back and forth with notes like "look at the storage", "I like the pegboard", "adding a light is a great idea". 

I have to give credit to my Mom who was the photographer, and meal cooker!
Dad and I just getting started


Laying out the side of the frames.

Because we are military, we know we're going to be moving, and I'd really like to take this with us, so we used carriage bolts to put the base of it together.


See how safe our set up was.... table saw box, with a cooler on top, and finally the miter saw!  We REALLY needed this workbench, to keep everyone safe!

This is a perfect description of how I felt putting the table saw together.   My love had gotten it the Christmas before, but we had never put it together


Mom is excellent at deciphering directions... we had it put together in no time three hours later (of the next day).  We decided that it wasn't necessary, and I just used the circular saw to cut what we needed to, and put it together (three hours later) the next day.

Adding the back support braces that will hold the peg board.

And here comes the peg board.

Brackets to hold the top shelf, and the light.

It's not shown here, but right after this we tried to lift it up.  Dad got on one side, I was on the other.  We did the typical '1-2-3, heave'.  Except it didn't BUDGE!  (This thing is heavy!).  We all about died laughing, and then Mom came and helped us, we re-leveraged everything, and we got it up.

Dad imparting some sort of valuable idea about what we should do next.

Putting in the light.

Finished!  It has been very useful in the past year!


Saturday, May 28, 2011

May 28th Garden


We were told by 'true gardeners' that we needed to thin our cucumbers.  My love was sad, he said it was mean to plan them, and then rip them up...  So we mourn! :)
This is what they look like thinned.  My parents are coming into town next weekend, so hopefully Mom can let me know if its OK now.

Friday, May 27, 2011

Garden Markers

**I got inspiration from a blog about a month ago... but I didn't bookmark it,

if it was you, let me know, I'd love to give you credit!****


When we started the garden, I put in the plastic 'markers' that came with each plant... but they were kinda boring, and I'm always looking for another project.


So, over the weekend, while my love and sweet girl were bike riding, I grabbed a grocery bag and my pruning shears, and wandered to the far side of the subdivision. We have 4 phases in our subdivision, and only 2 are built out (with the 3rd just starting...). Ont the back side of the subdivision is trees. Lots of trees. I love them. They are so green (growing up in New Mexico, you notice green!), and have so many sticks. I also love sticks! They saw me at some point, and came an joined me for my trek in 'the woods'. The biggest part of the trek was getting through the foot high grasses, but hey, it was fun! I cut the dead branches off the trees that were about 1" in diameter. Then I cut them into 10-12 inch lengths.


Once we got home, I used my husbands box cutter to scrap off the bark, and get an even surface. At his wise suggestion, I put the stopper in the sink to stop all the bark and such from actually going down our drain. We figured that might not have the best outcome!


This is what my kitchen looked like.... I did a good 'overhaul' clean that morning, and had to re do the sink area after I got done!


When I got them all scraped, I used a thin point sharpie to write each plant name on them. I took them outside and used clear gloss spray paint to seal the writing. I learned that you do not want to spray close, otherwise the sharpie will bleed. Instead, do lots of light, far-away coats until the writing is covered (12"+). Then you can spray closer to get a thicker coverage, and better protection.


This picture is blurry, but you can tell the writing got messed up... this was one that I started spraying to close.


Once they were dry, I took them out, and used my small hammer to put them in next to the plants in the garden.


My love commented, "but you already knew what they were". Yes, I did, but this was fun, looks cool, and way better then the plastic tags!


Weekend Bloggy Reading


Photobucket

Running with Glitter

Tuesday, May 24, 2011

Things are growing!

The overall garden!

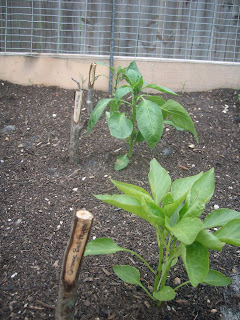
I made some new 'garden markers'... I love them!

Cucumbers


Sugar Snap Peas

Green Beans

Bell Peppers

Sweet Onions

Banana Peppers

Saturday, May 21, 2011

Leaves!

Most of the plants look like this

and this.

But some of the peas look like this!

And some of the beans look like ths!!!

I was SO excited that things were growing. 

This is how excited Trav was. Oh well!

This is how we keep the dog's out.

We have it attached on the bottom on the two short sides, and the back, and then the front side we can 'roll' off and we can get to everything that way.

Thursday, May 19, 2011

Damn Dogs

So... we have these three dogs. The biggest one, the Great Dane, loves to dig.  She won't dig up grass, but if there is dirt exposed, she loves it.  She looks at the garden and sees one big diggin' pile.  But, as big as she is, she hates the sound of wal mart bags.  I thought if I put stakes in the corners and stung bags between them it might keep them out.  It was a good idea in theory, but to flimsy.  One night when I was at meetings late, Trav re did it with bailing wire instead of string, and then tied the bags around that.  We finally gave up, and took that out.  We're going to have to come up with a new solution soon.


Ok dog's you've been warned!  Keep getting in my garden, and this will no longer be your happy home!
Knuckle heads!